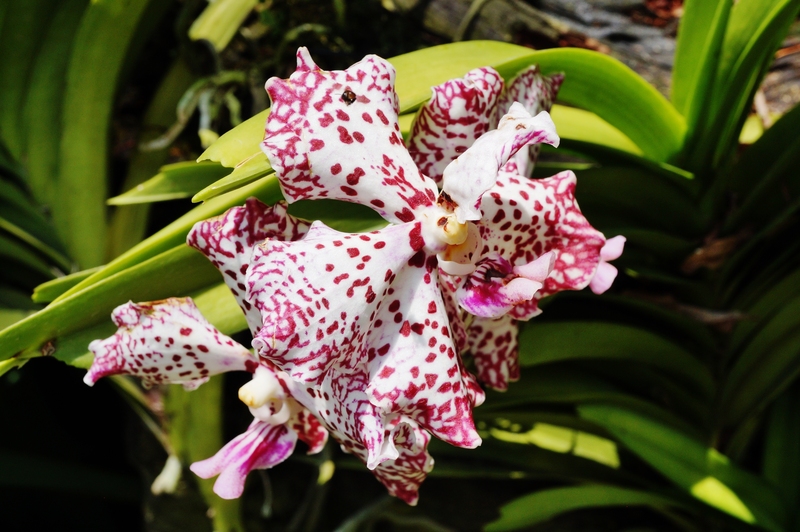
Orchid Care Made Easy with Step-by-Step Advice
Posted on 12/09/2025
Orchid Care Made Easy with Step-by-Step Advice
Orchids are often perceived as delicate and high-maintenance plants, but this reputation is undeserved. With the right guidance, caring for orchids is not just achievable--it's enjoyable and rewarding! Whether you are new to indoor gardening or an experienced plant enthusiast, this comprehensive guide to orchid care will demystify the process, providing you with step-by-step advice that will ensure vibrant, long-lasting blooms.

Understanding Orchids: A Brief Introduction
Before delving into specific orchid care tips, it's important to understand what makes these exotic beauties unique. Orchids belong to the Orchidaceae family, which is among the largest and most diverse plant families in the world, with over 25,000 species. Popular varieties for indoor cultivation include Phalaenopsis (moth orchids), Dendrobium, Cattleya, and Oncidium. Most indoor orchids are epiphytes, meaning they naturally grow on trees rather than in soil, absorbing moisture and nutrients from the air and rain.
This distinct lifestyle is the key to unlocking effective and easy orchid care at home.
Choosing the Right Orchid
Some orchids are easier to care for than others. For beginners, it's best to start with resilient species that thrive with minimal fuss. Here are some top orchid varieties for beginners:
- Phalaenopsis (Moth Orchid): Known for their stunning, long-lasting flowers and forgiving nature, these are the most popular orchids in households.
- Dendrobium: These versatile orchids produce elegant clusters of blooms and can adapt to a wide range of home environments.
- Oncidium: Nicknamed "Dancing Ladies," these orchids are cheerful and tolerate more frequent watering.
Tip: When purchasing an orchid, choose a plant with healthy green leaves and visible white roots.
Step-by-Step Orchid Care Guide
1. Selecting the Ideal Location
Orchids thrive best in environments that mimic their native habitat--bright, indirect light, adequate humidity, and good airflow. Here is how to find the perfect spot:
- Light: Place your orchid plant near an east or west-facing window, where it receives filtered sunlight. Avoid direct midday sun, which can scorch the leaves.
- Temperature: Most orchids prefer daytime temperatures between 65-80?F (18-27?C) and a nighttime drop to 60-70?F (15-21?C).
- Humidity: Orchids flourish with humidity levels between 50% and 70%. You can boost humidity by placing a tray of water with pebbles near your plant or using a humidifier.
- Airflow: Good circulation helps prevent fungal diseases; a gentle fan nearby can work wonders.
2. Choosing the Correct Pot and Potting Mix
Because most indoor orchids are epiphytes, they require a very well-draining potting medium. Traditional soil is unsuitable for orchids, as it retains too much moisture and can cause root rot.
- Pot: Use a slotted or clear plastic orchid pot with ample drainage holes to prevent waterlogging and allow light to reach the roots if growing Phalaenopsis.
- Potting Mix: The best orchid mix contains bark chips, sphagnum moss, charcoal, and perlite. This airy blend provides stability and aeration.
Tip: Repot orchids every 1-2 years or whenever the potting mix breaks down or roots outgrow the container.
3. Watering Orchids: The Right Way
Proper orchid watering is often where new growers go wrong. Overwatering, rather than underwatering, is the most common issue, leading to root rot.
- Check Moisture: Stick your finger an inch into the potting mix. If it feels dry, it's time to water.
- Frequency: Water once every 7-10 days for most orchids. During the growing season (spring and summer), you might water more frequently. In winter, scale back considerably.
- Water Quality: Use room-temperature, distilled, or rainwater if possible. Avoid tap water with high mineral content or chlorine.
- How to Water: Drench the potting mix until water drains out the bottom of the pot. Never leave the pot sitting in water.
4. Feeding Your Orchid
Orchids need regular feeding to grow and bloom beautifully. However, too much fertilizer can damage roots.
- Type: Use a balanced, water-soluble fertilizer (such as 20-20-20) specifically made for orchids.
- How Often: Feed lightly every 2-4 weeks during the growing season. Dilute the fertilizer to half the recommended strength.
- Skip Feeding: When the plant is dormant (after flowering), reduce or pause fertilization until new growth appears.
5. Pruning and After-Bloom Orchid Care
After your orchid finishes blooming, it might look a little worn out, but careful pruning will help it recover and encourage new growth.
- Remove Spent Blooms: Gently snip off faded flowers and stems with sterilized scissors or shears.
- Handle Flower Spikes: If the flower spike turns brown, cut it at the base. If it stays green, you can cut above a node to encourage occasional side shoots, especially with Phalaenopsis.
- Inspect for Pests: Look for signs of scale, mites, or mealybugs, and treat with insecticidal soap if necessary.
6. Repotting Your Orchid
Repotting is crucial for healthy orchid plants. It ensures the roots have room to grow and keeps the potting mix fresh and free of decaying material.
Here's how to repot your orchid step by step:- Remove the Orchid: Gently squeeze the pot and tip the plant out. Loosen and rinse away old potting mix from the roots.
- Prune Dead Roots: Trim away any mushy, brown, or black roots with sterilized scissors.
- Pot in Fresh Mix: Place the orchid in a new container with fresh orchid mix, tucking the roots in gently but firmly.
- Water Lightly: Moisten the potting mix after repotting and allow the plant to adjust for a few days before resuming regular care.
Tip: Repotting is best done when the orchid is not in active bloom.
Common Orchid Problems and Their Solutions
Even with the best care, issues can arise. Here's how to troubleshoot common orchid care problems:
- Yellowing Leaves: Often a sign of overwatering or direct sun exposure. Adjust watering routines and move to a shadier spot if needed.
- Wrinkled Leaves: Usually caused by underwatering or root problems. Check roots for health and increase watering frequency if the mix is dry.
- Failure to Bloom: Ensure your orchid is getting enough light. Some species require a drop in nighttime temperature to trigger blooming.
- Root Rot: Caused by excessive moisture and poor drainage. Always use well-draining orchid mix and containers.
- Pests: Treat infestations promptly with insecticidal soap or by removing pests with a cotton swab dipped in alcohol.
Essential Orchid Care Tips for Year-Round Success
- Monitor Light: Leaves should be bright green--not dark green (too little light) or yellowish (too much light).
- Maintain Consistent Routines: Orchids thrive with predictable schedules for watering and feeding.
- Don't Mistake Dormancy for Decline: Many orchids shed old leaves or stall growth after blooming, but this is often a normal rest period before the next flowering cycle.
- Use Clean Tools: Sterilize pruning scissors and shears to prevent the spread of disease.
- Patience Pays Off: With the correct orchid care techniques, you'll be rewarded with remarkable blooms year after year.
Advanced Orchid Care: Encouraging Re-Bloom
One of the greatest joys of successful orchid care is witnessing your orchid bloom again and again. While some beginner-friendly orchids like Phalaenopsis might rebloom with minimal prompting, others require a little more effort:
- Temperature Changes: Many orchids benefit from a brief drop in nighttime temperatures by 10-15?F for a few weeks in autumn. This change often triggers the bloom cycle.
- Fertilizing for Blooms: Use a "bloom booster" fertilizer (higher in phosphorus) before and during the expected blooming period.
- Consistent Light: Sufficient bright, indirect light is key for flower spike production.
*Patience is crucial! Some orchids bloom only once a year, while others like Phalaenopsis can bloom multiple times with the right orchid care routine.*

Orchid Care FAQ: Answering Your Top Questions
How often should I water my orchid?
It depends on the orchid variety, but as a general rule, water every 7-10 days. Always check the potting mix to ensure it is dry before watering. Overwatering is one of the most frequent orchid care mistakes.
When should I fertilize my orchid?
Fertilize every 2-4 weeks using a weak (half-strength) orchid fertilizer during the active growing season. Cut back during dormancy.
Can I use regular potting soil for my orchid?
No. Use specialty orchid potting mix which provides the aeration and drainage necessary for healthy orchid roots.
Why are my orchid leaves turning yellow?
The most common causes are overwatering, too much sunlight, or natural leaf aging. Examine your care routine and adjust as needed.
How do I encourage my orchid to rebloom?
Ensure your orchid has enough light, a drop in nighttime temperatures in the fall, and reduce watering slightly to mimic natural seasonal cues.
Conclusion: Orchid Care Made Simple
With the proper orchid care advice and a commitment to following these step-by-step instructions, anyone can transform their home into a haven for these beautiful blooms. Remember, healthy orchids are the product of careful observation, gentle handling, and consistency. Don't be discouraged by minor setbacks--with patience and attention, your orchids will thrive, gracing you with exquisite flowers and vibrant green foliage for years to come.
If you're looking for more orchid care guides or want specific tips for different orchid species, explore our blog for expert orchid care tips and solutions.
Quick Step-by-Step Orchid Care Checklist
- Pick beginner-friendly species like Phalaenopsis or Dendrobium.
- Choose a bright spot with indirect sunlight and proper humidity.
- Use a special orchid potting mix and a well-ventilated pot.
- Water thoroughly, but only when the mix feels dry.
- Feed gently with specialized orchid fertilizer during growth.
- Repot every 1-2 years to maintain healthy roots.
- Prune spent flowers and inspect regularly for pests or diseases.
Now that you've learned the essentials of orchid care made easy, you're ready to enjoy these enchanting plants in your own home. Happy gardening!
Latest Posts
Vertical Gardening: A New Green Revolution
Container gardening: A guide to urban green spaces
Herb Gardening Tips for Every Season


